Messerschmitt Bf109E
Cockpit Details


e_flap.wheels.jpg (54729 bytes)

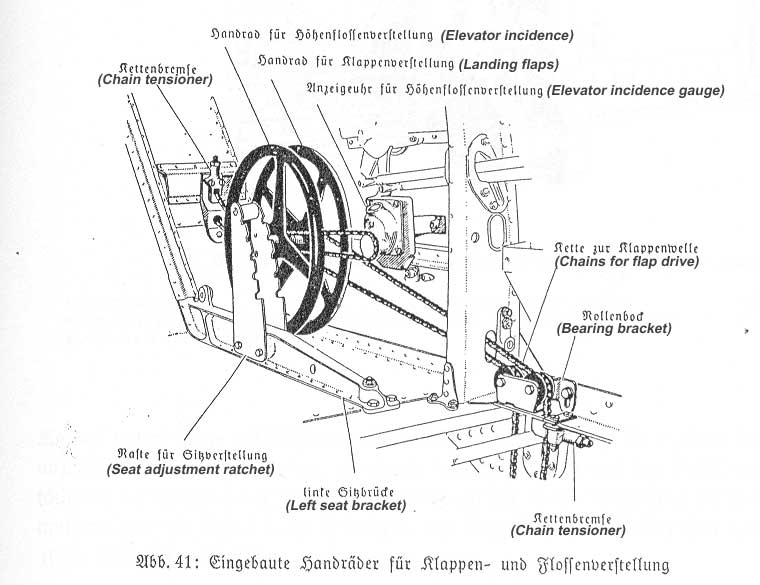
This view of the port cockpit wall shows the twin wheels governing elevator incidence and flap trim.

e_left.wall.jpg (114639 bytes)

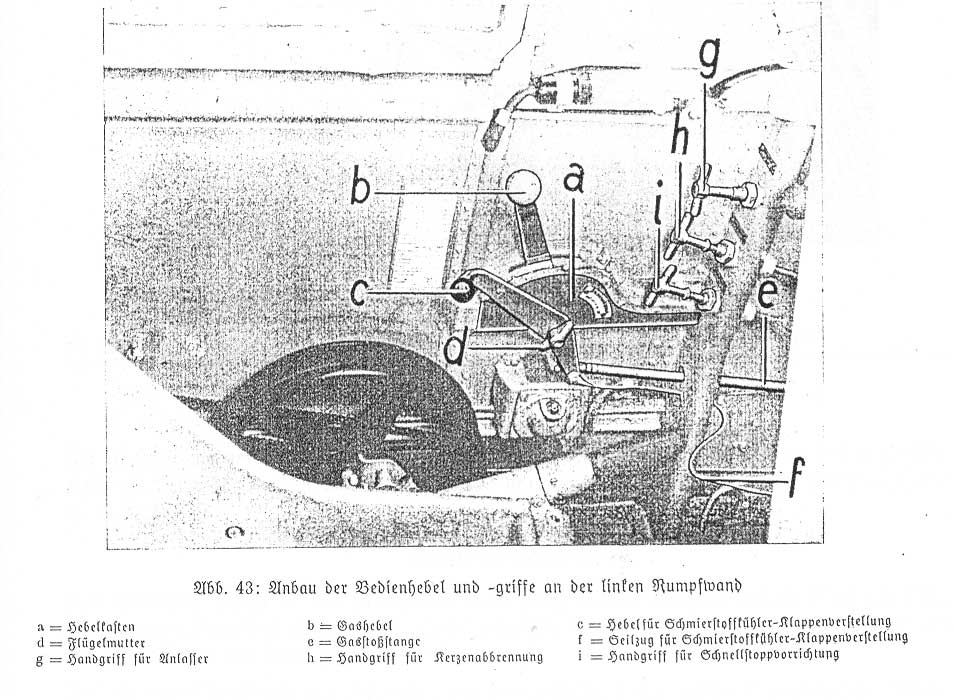
Another port wall view gives further details on the throttle assembly and ancillary components.

e_rt.wall.jpg (146681 bytes)

Moving to the starboard wall, this overview gives an idea of the amount of equipment shoehorned in this area.

e_fuse.panel.jpg (136457 bytes)

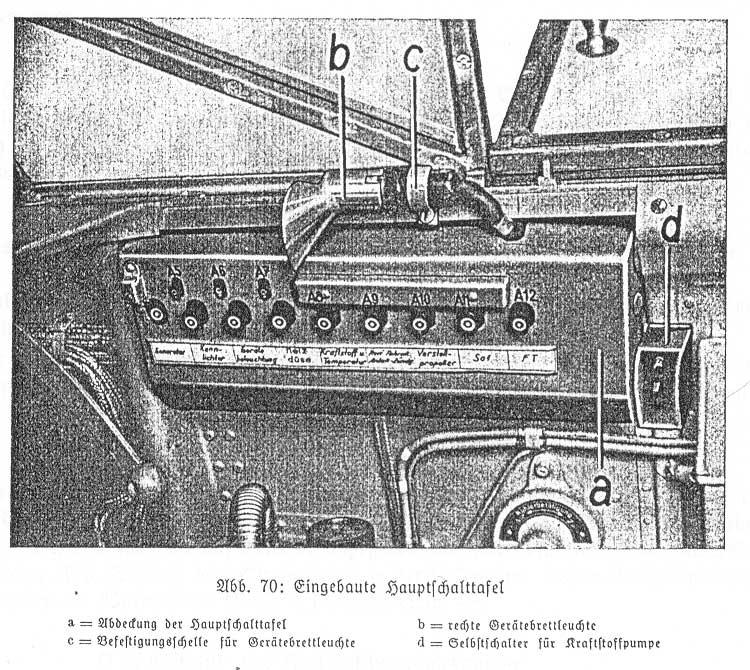
The fuse panel (Schalttafel) layout is detailed in this closeup.


e_inst.panel-lower.jpg (61811 bytes)

Lower instrument panel layout

e_inst.panel-upper.jpg (86250 bytes)

Upper instrument panel layout

e_inst.panel-back.jpg (130486 bytes)

For those so inclined to add such detail, this is a view behind the zippered leather cover over the rear of the upper instrument panel.


e_seatfront.jpg (70992 bytes)

View of the pilot's seat from the front

e_seatback.1.jpg (67508 bytes)

This view shows the mounting brackets for the pilot's seat

e_seatback.2.jpg (45387 bytes)

The seat adjustment lever is permanently affixed to the seat itself, as shown here.  Also note the retention method for the shoulder harness.


e_floor.installed.jpg (136270 bytes)

In this view of the cockpit with the seat removed, the lower fuel tank pickup can be seen along with a number of other salient details.

e_stick.jpg (42166 bytes)

The control column was not curved or bent as rendered in several kits; it was a straightforward affair.

e_floor.panels.jpg (53646 bytes)

Admit it- you've always wondered about that strange central pedestal beneath the instrument panel in Emil cockpits... well, here's what it looks like.

e_rudder.bar_assy.jpg (22805 bytes)

The rudder pedal bar assembly was surprisingly involved...

e_rudder.bar_mounted.jpg (29307 bytes)

... with a number of different linkages to ensure smooth and proportional operation.